|
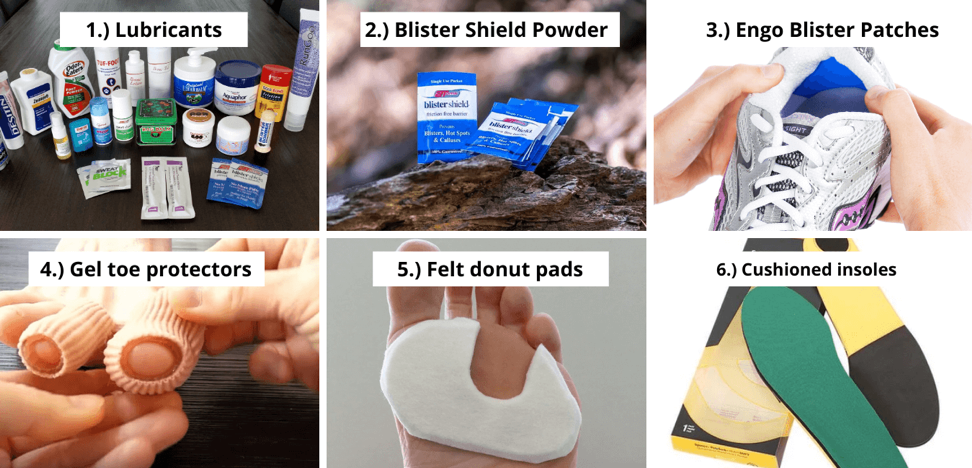
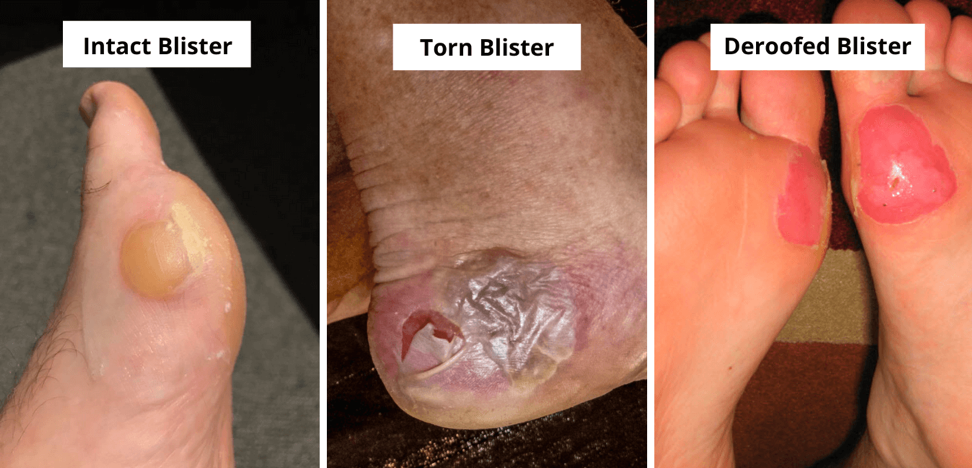
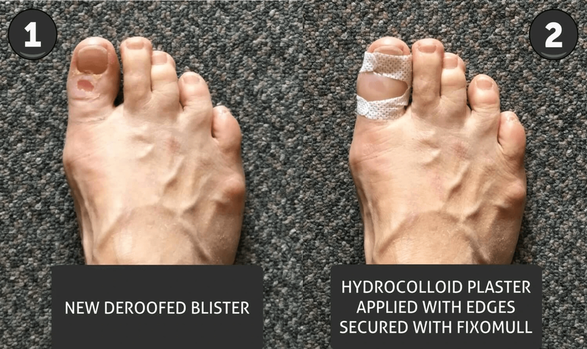
But in this article, I will only discuss the blister treatment options that are medically sound and supremely effective. These are the techniques that as a podiatrist, I have used to great effect for runners at every 6-Day ultramarathon in Australia since 2014. Before we begin, let’s talk about pre-emptive blister prevention techniques. Blister Prevention The idea of prevention as the primary intervention is what I adhere to most. And when we talk about blister prevention, it’s a very broad topic that can cover a lot of methods. For the purposes of this article, I’m going to assume you’ve already got great running shoes that fit well, you’re tying your laces nice and firm to hold your foot secure in your shoe, and you’re wearing moisture-wicking socks. What’s the first thing to do if you’re getting blisters when you run? Taping! Blister Taping Sometimes one or two pieces of tape applied with good technique is all you need to prevent blisters. If you haven’t tried it before, you can copy these 3 blister taping techniques for taping your toes, ball-of-foot and heels and get some ideas of what tape to use. If you’ve tried taping already and you’re still getting blisters, it’s time to use some products that reduce friction levels, like lubricants, powders or Engo patches. And products that reduce pressure, like gel toe protectors, felt donut pads, cushioned insoles or orthotics. Blister Treatment In a not-so-perfect world, sometimes blister prevention is not sufficient or applied too late and you still get a blister. The first step in treating your blister correctly is to know what kind of blister you have got. Below are the three kinds of blisters that you should know about. And here’s a video on how to treat your blister - according to the integrity of your blister roof (below). Now that you’ve learned the types of blisters, let's proceed to blister treatment options, which will center around dressing selection and infection control. Dressing Selection Choosing the right dressing for blisters is as important as picking the right running shoes for your feet. Island Dressings An island dressing, like the good old Band-Aid, is a good choice and can be applied to any type of blister, whether it’s intact, torn, or deroofed. Just make sure the absorbent non-adhesive “island” can cover more than your blister size. And make sure it’s secured on all edges so no dirt can get in. When you see strikethrough – that is, either water has soaked the island from the outside-in, or blister fluids have soaked the island from the inside-out – change it. A soggy island allows germs to travel through onto your blister, which you’re trying to keep clean. Hydrocolloid Blister Plasters Since deroofed blisters are particularly painful, infection-prone and take the longest to heal, I highly suggest you apply hydrocolloid blister plasters on these. They are exudate-absorbent hydrophilic gel dressings specially made to treat deroofed blisters. The weepiness from your raw blister base will combine with the hydrocolloid material and form a gooey environment that helps wounds heal faster (as shown in the images below) – faster than an island dressing. Change your hydrocolloid dressing when you see the gooey center grows bigger and almost reaches the edge. You can read more about how to get the most out of hydrocolloid plasters here. Infection Control To prevent your blister from getting a germ in it, every blister should be protected and kept clean until it heals. This is especially so for torn and deroofed blisters. Preventing infection will allow your blister to heal faster, not to mention avoid any serious life-threatening complications. Here’s how you can avoid an infected blister.
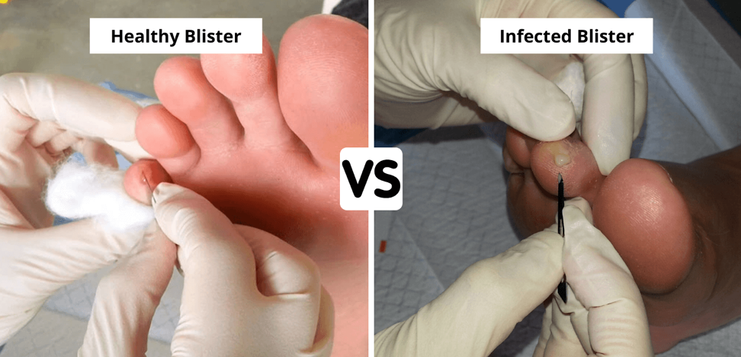
In case you did all the infection control steps above, but still your blister got infected and it seems to be getting worse, be sure to check this guide on how to treat an infected blister and the signs to look for telling you your blister infection is spreading. But first, here’s one way you can spot an infected blister from a healthy blister. Pus! Normal healthy blister fluid is thin and clear; pus is thicker and either yellow or greenish. Final Tip Once you’ve treated and dressed your blister, go to the effort to implement the best prevention strategy you can find for that blister location. For example, if it’s a blister under the ball of your foot, apply a felt donut pad to take the pressure off it. If it’s a blister on the tip of your hammertoe, apply a toe-prop under the toe to reduce the weightbearing pressure. If it’s a blister at the back of your heel, apply an Engo blister patch to your shoe to massively reduce friction levels. You won’t believe how much better your blister will feel as you continue to run with it. Don’t underestimate the value of prevention, even when it comes to treatment. Conclusion The key takeaway from this article is to prioritize prevention above all. Sure, “prevention is better than cure.” But then again, there are still instances where blisters raise their ugly heads no matter how hard you tried to protect your feet. When this happens, just remember the blister treatment advice I have shared in this article. And if you want to know more about blisters, feel free to visit the Blister Prevention website, where you can find lots of blister resources that may help you in the future. About The Author
1 Comment
https://calgarypodiatry.ca/
4/3/2023 07:13:07 pm
Thank you for this information. Indeed, this is helpful. If you want to know more about foot problems, treatment, and feet surgeries. You can visit this site https://calgarypodiatry.ca/
Reply
Leave a Reply. |


 RSS Feed

